Having crossed frontiers in unknown and unsafe land, finally, we are settling down.
After having described last time how to create our own cryptocurrency in Ethereum Frontier – the description of which was way to complicated as we have learnt – we will repeat it, this time in Ethereum Homestead, and we assure you: this time it will be really easy.
In fact, creating a new cryptocurrency is even built into the new Ethereum wallet, so if you use the proposed “coin-interface“, your own currency is even supported with an own pocket in the wallet itself, besides your real Ether – this is just gorgeous and if you are still unsure about the world dominance about Ethereum, try this out and hopefully, just be astonished.
Ok, enough propaganga, let’s get down to the nitty-gritty.
Objective
Create you own cryptocurrency in Ethereum Homestead. You should be able to fund yourself with some amount of initial value (let’s say 10000 items) of your own currency and be able to send it around to any valid Ethereum address.
This currency should in no way be related or dependent on an existing crytocurrency like Bitcoins or Ether and creating it should cost you not one penny of your fiat or “real” crypto-money.
Setup
The easiest way to archieve the goal would be to just follow the instructions on the new ethereum.org Homestead site closely, you can then use your cryptocurrency in the real and in the Morden testnet.
However, this approach has two limitations:
- It takes longer than five minutes, which is our definition of really easy (but afterwards you will know why it works)
- It runs on the real Ethereum blockchain or on the Morden testnet, but we want to build this using own very own, local and/or private, Ethereum blockchain.
If these limitations do not apply for me, stop here and go ahead and read the official tutorial.
Ok, I want my local, private blockchain, really fast, so let’s go…
- Install the Geth Ethereum client as described here (for Linux/OSX and Windows)
- Install the Ethereum Wallet as described on the main ethereum Homestead site.
Ready, Set…
- Start Geth with an own genesis file and an unique networkid (greater than 1), for details see this post.
You can use this genesis file, just store it as /ethereum/genesis.json (always add the drive for Windows, eg. c:/ethereum/genesis.json)
{
    "nonce": "0xdeadbeefdeadbeef",
    "timestamp": "0x0",
    "parentHash": "0x0000000000000000000000000000000000000000000000000000000000000000",
    "extraData": "0x0",
    "gasLimit": "0x8000000",
    "difficulty": "0x400",
    "mixhash": "0x0000000000000000000000000000000000000000000000000000000000000000",
    "coinbase": "0x3333333333333333333333333333333333333333",
    "alloc": {
    }
}
and create the empty directory /ethereum/data
The start command then isgeth --genesis /ethereum/genesis.json --datadir /ethereum/data --networkid 123 --nodiscover --maxpeers 0 console
we need this initial start with the console to create our first account, which we need to start mining.
In the console, typepersonal.newAccount()
and create your “etherbase”-account. Subsequent accounts can be created in the Ethereum Wallet.
Make sure that you exit geth afterwards.…Go
- Now, start the Ethereum Wallet, make sure Geth is not running currently
There will be several dialogs, it does not really matter what you type in there. You should choose testnet if asked for real or Morden testnet. - Afterwards, when all steps have been completed, you will see an empty account in the Morden testnet

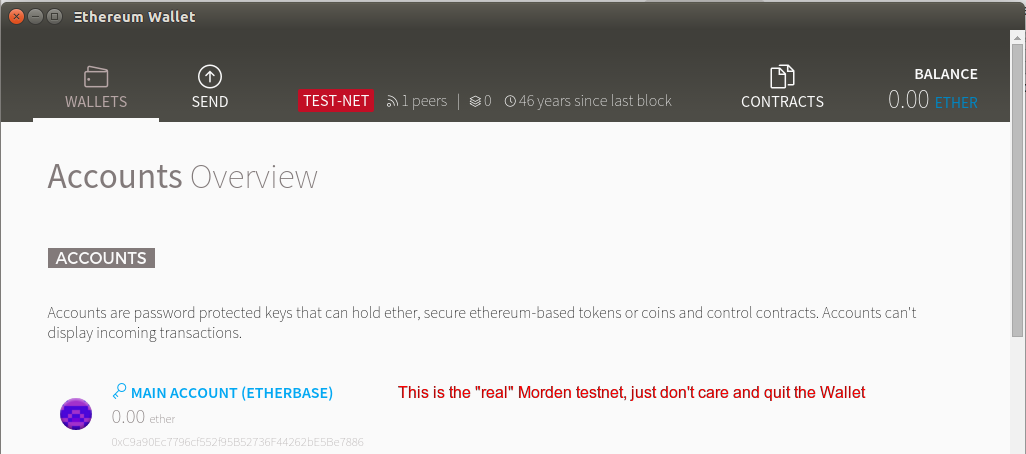
- Quit the Wallet.
- To start the Wallet using our local testnet, consult the readme.txt in the installation folder and make sure you set the ipcpath cli argument correctly. On Windows, you can skip this step.
- Start geth with this parameters (plus the ipcpath, if on Linux)
geth --genesis /ethereum/genesis.json --datadir /ethereum/data --networkid 123 --nodiscover --maxpeers 0 --mine
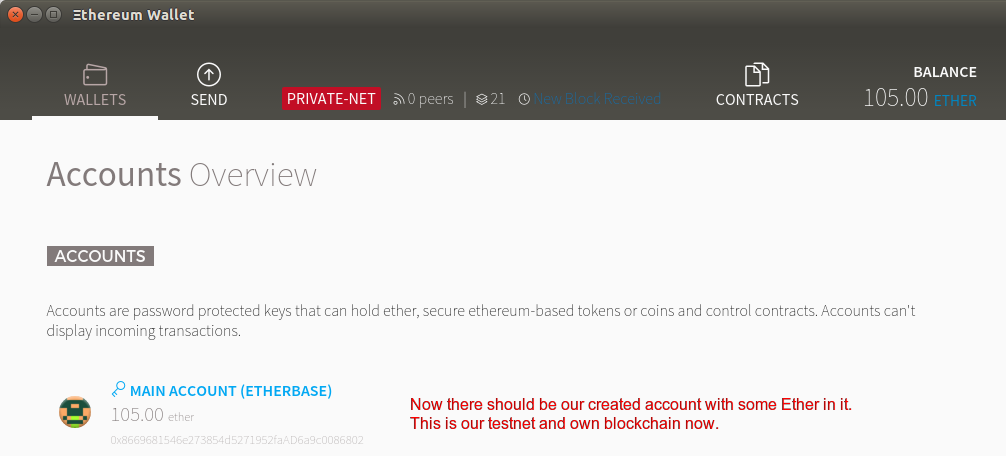
After restarting the Wallet, we should see our created account with some Ether in it (we are mining currently and the difficulty is really low and we have no peers, so we get all the money)
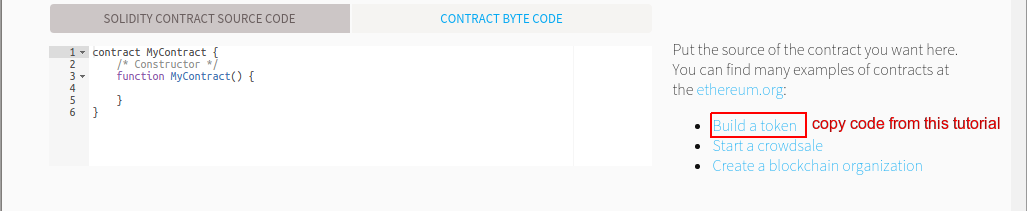
Choose Contracts and Copy & Paste the code from the tutorial…
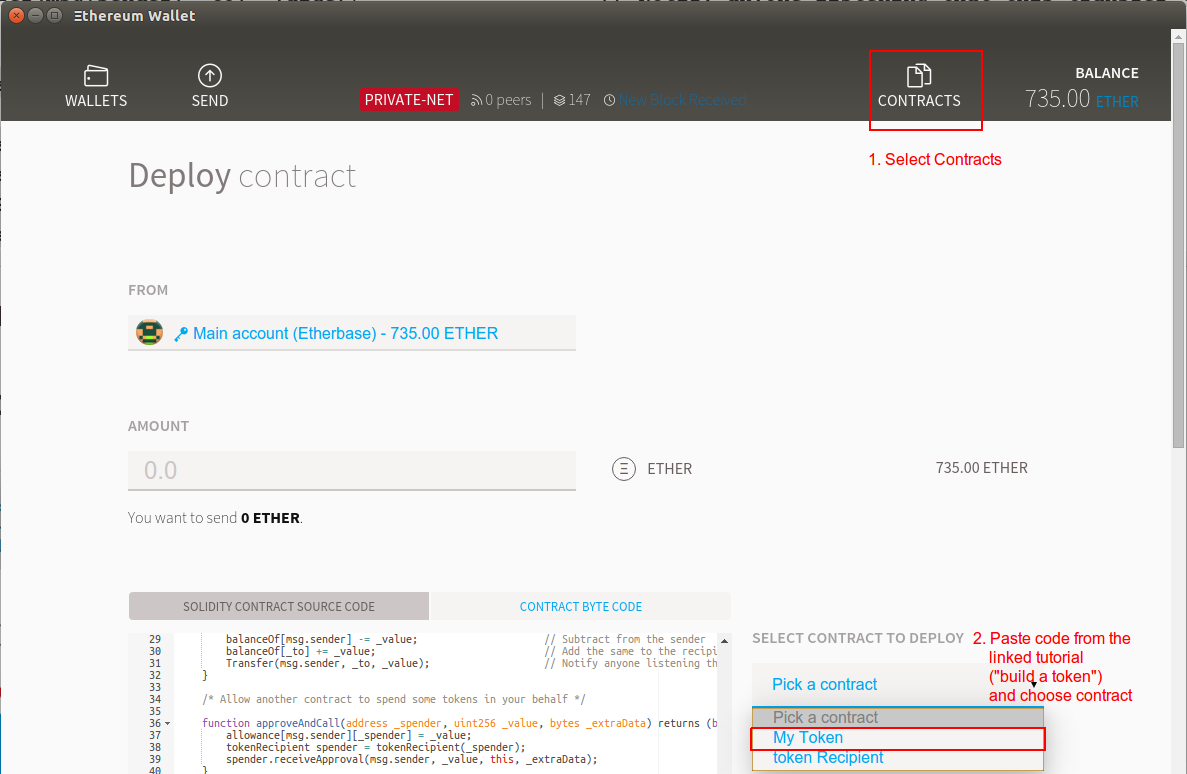
…linked on the contracts page
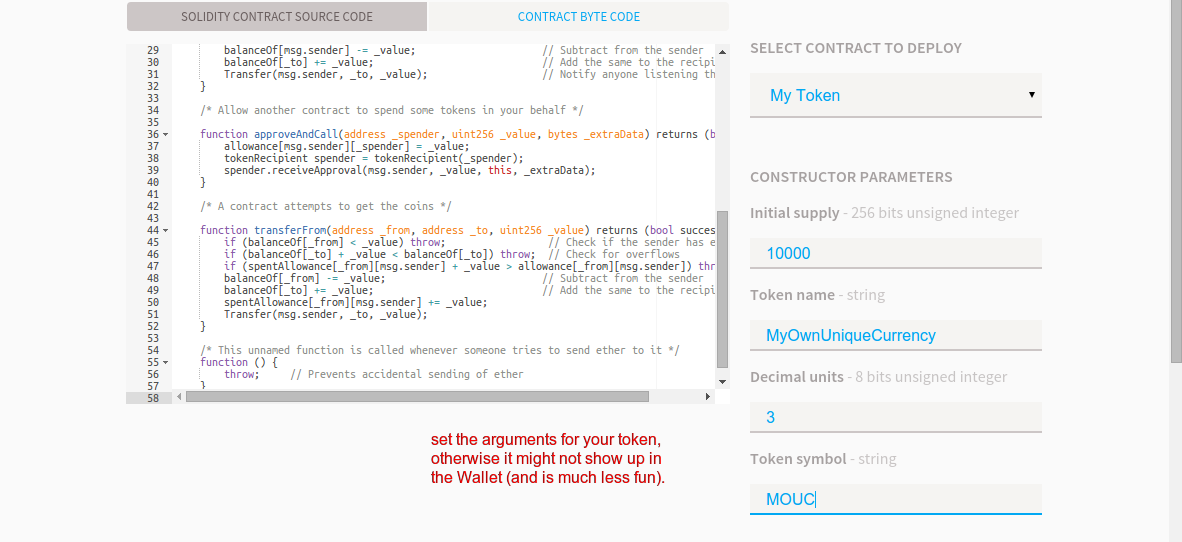
Don’t forget to set the arguments for your token/currency (like display name, initial supply, etc.)
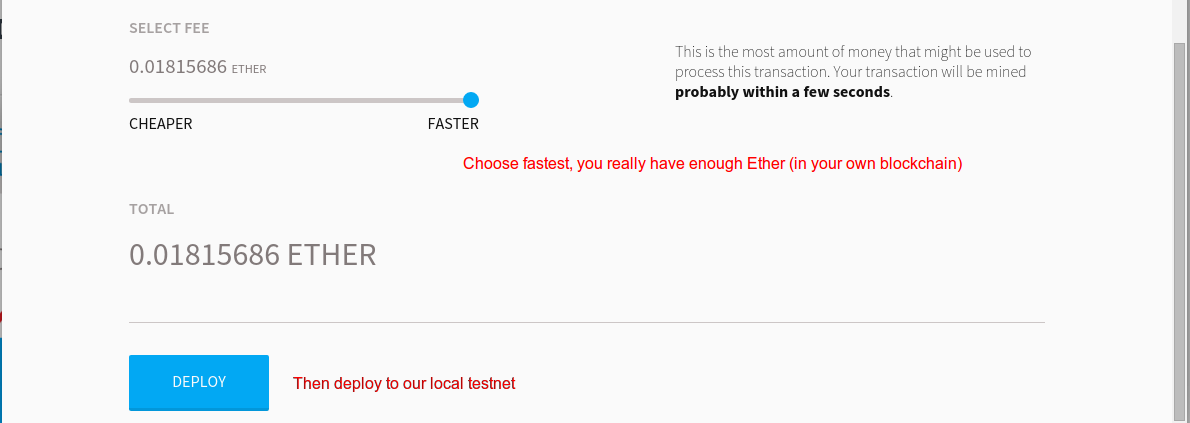
Choose the fastest possible deployment (we have enough Ether right now).
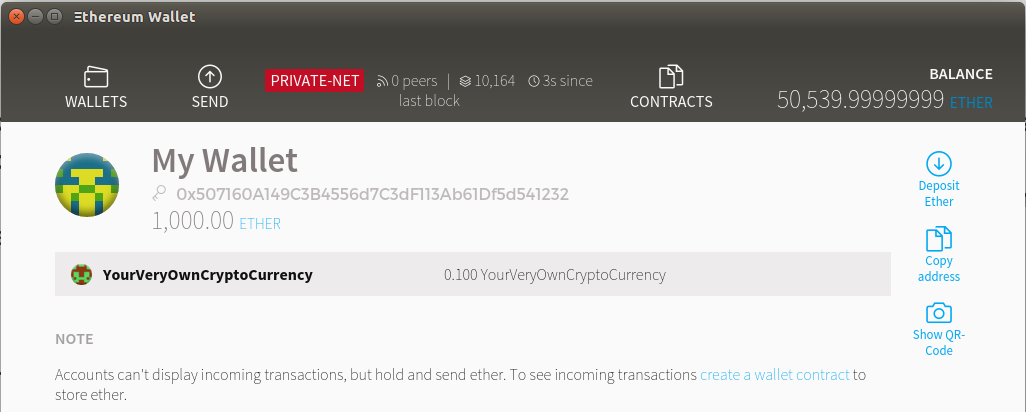
Here we go, congrats to your very own cryptocurrency with Wallet support.

Please comment on this tutorial, does it work for you? Did you get stuck at some step? We want to improve out tutorials to make sure more people use this great technology.